Mastering natural light archviz techniques: from sun path to believable renders
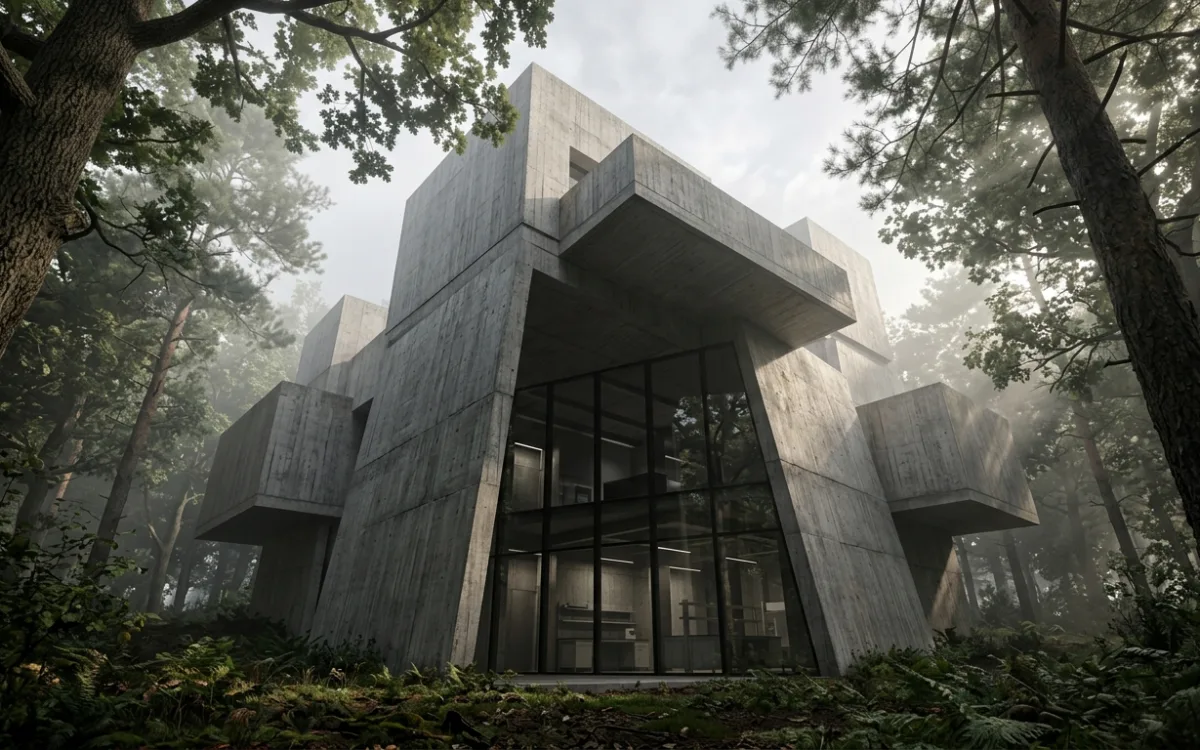
Natural light archviz techniques come down to a single test. Does the light in the image behave like physics, or does it only look bright?
That test decides whether a client believes the render or just politely nods at it. Sun angle, sky model, colour temperature, post-production: all of it is in service of that one question.
Most guides treat lighting as a settings problem. Find the right values, get the right image. It is not a settings problem. Architects who have already found the right values describe the result the same way: "it feels like the light has no real impact or as if there are a lot of 'fake' and hidden light sources." The numbers were fine. The light was not honest.
Honest light is light that behaves like physics: one dominant source, shadows that agree with it, bounce that carries colour from the surfaces it hit, and nothing illuminated from a direction the scene cannot explain.
This piece covers the fundamentals, the techniques that follow from them, artificial light and how to mix it with daylight, and what changes when a photography-trained model does the lighting instead of a render engine. Including what that still gets wrong.
Why natural light archviz techniques decide the whole image
Light is not the finishing layer on a visualization. It is the layer that makes every other layer readable.
Light carries the emotion before the design is read
A viewer reacts to the light within a second, long before reading the plan behind it. Warm low sun reads as calm. Flat overcast reads as technical. Deep contrast reads as drama. For a client who cannot read a floor plan, and most clients cannot, the light is the first honest information they get about how the space will feel.
Light is what makes design intent survive the render
When shadows fall where they should, when materials pick up the colour of what sits next to them, when haze softens the far end of a street, the viewer stops evaluating the image and starts evaluating the building. Broken light does the opposite. It makes the image the subject.
Light is a sculptor of form, texture and space
Light and shadow rebuild the third dimension the flat image lost. Strong directional light sharpens the edges of a facade. Soft ambient light reveals the grain of a textured wall. Contact shadows tell the eye that a bench rests on the ground rather than floating above it. Without that work, a facade with real depth renders as a flat drawing of itself.
The fundamentals of natural illumination
Every technique below is downstream of four physical facts. Get these wrong and no amount of grading rescues the image.
Sun path and time of day
The sun's position drives everything: shadow length, shadow direction, contrast, and colour.
- Morning light. Low angle, long shadows, warm cast, moderate intensity.
- Midday light. High angle, short and hard shadows, intense and comparatively cool. Unforgiving on a facade with little relief.
- Afternoon and evening light. The angle drops again, shadows stretch, colour saturates toward orange.
Sun path also depends on latitude and season, which is why the same building renders differently in Oslo and in Dubai on the same calendar day. If the shadows do not match the site, an architect looking at the image will feel the error without naming it.
Golden hour and blue hour
The two windows that do the most work per minute of render time.
Golden hour, roughly the hour after sunrise and before sunset, gives you a low sun travelling through more atmosphere. Long raking shadows, warm saturated light, strong modelling on any textured surface. It flatters almost every exterior, which is also its risk: golden hour on every image reads as a filter rather than a place.
Blue hour, just after the sun drops below the horizon, is the twilight shot. The sky becomes the dominant source, cool and even, and interior lights read as warm points against it. This is the frame where a building looks inhabited, and the one that most rewards getting artificial light right.
Sky conditions
The sky is a light source the size of the sky, and its condition changes the character of everything.
- Clear sky. Direct sun dominates. Sharp, well-defined shadows, cool ambient fill.
- Overcast sky. Cloud acts as one enormous diffuser. Soft, nearly shadowless, even light. Ideal when the subject is material detail rather than drama.
- Dawn and dusk. The sun is at or below the horizon and the sky itself becomes the primary source, with gradients rather than a single direction.
Atmospheric scattering and haze
Rayleigh scattering is why the sky is blue at noon and red at the edges of the day: short blue wavelengths scatter most, and at low sun angles only the long wavelengths survive the trip through the atmosphere.
Haze from dust or humidity does something a render engine will not add unless you ask. It lowers contrast with distance, desaturates the background, and separates foreground from horizon. Its absence is one of the most common reasons a technically correct exterior still reads as synthetic.
Direct and indirect light
Natural illumination is almost never just the sun.
Direct light arrives straight from the source and produces the defined shadow. Indirect light has bounced off the ground, the neighbouring wall, the ceiling, or been scattered by the sky. That is global illumination, and it is what fills the shadow instead of leaving it black. It also carries colour: sunlight bouncing off a terracotta paving slab tints the soffit above it.
An interior lit only by direct sun looks like a cave with a spotlight in it. The bounce is not a subtlety. It is most of the light in the room.
Essential natural light archviz techniques
The fundamentals, applied.
Directional light: the sun
A directional light is an infinitely distant source with parallel rays, which is exactly what the sun is at this scale.
- Angle sets shadow length and direction, and therefore the time of day. This is the single most consequential value in the scene.
- Intensity sets exposure. Overexposed midday is the most common self-inflicted wound in exterior archviz.
- Colour is usually near-neutral, warming as the sun drops.
Ambient light and HDRI sky domes
Ambient light stands in for the sky, either as a uniform sky dome or as an HDRI.
A sky dome gives soft, directionless fill, which is enough for a clean overcast study. An HDRI is a 360 degree photograph of a real environment carrying the real intensity range of that place. It supplies fill, reflection content and colour in one object, which is why it beats any hand-built dome in a scene with glass or metal. If the render has reflective surfaces, the HDRI is doing half your realism work.
Global illumination
Without GI, shadows are black and interiors are dark holes behind bright windows. With it, light bounces, fills, and bleeds colour between adjacent surfaces. A red wall throws faint warmth onto the white ceiling next to it, and the eye reads that tiny effect as truth without ever noticing it.
Shadow play: hard, soft and contact shadows
Shadows are not the absence of light, they are the description of it.
- Hard shadows come from small or distant intense sources, mainly the clear-sky sun.
- Soft shadows come from large diffuse sources: overcast sky, a big area light, a window.
- Contact shadows are the dark line exactly where an object meets a surface. They are small, they are subtle, and leaving them out is the fastest way to make furniture float.
Match shadow softness to the source you claim to have. A hard shadow under an overcast sky is a contradiction the viewer will feel immediately, even if they never work out why.
Contrast and reflections
Flat renders are usually a contrast problem, not a light-quantity problem. A dull scene is often lit from too many directions at once, with no single source allowed to dominate.
Reflections carry environment information: a window returning a cloudy sky, a polished floor returning the room. Roughness controls how sharp that return is, and reflectivity rises at grazing angles. Get roughness wrong and concrete looks wet. That interaction is worth studying on its own, in how materials behave under light.
Light temperature and colour: where mood actually comes from
Direction sets the drama. Colour sets the feeling.
The Kelvin scale, briefly
- Warm, roughly 1800K to 3500K. Candlelight, incandescent bulbs, sunrise and sunset. Reads as intimate and domestic.
- Neutral, roughly 4000K to 5500K. Direct midday sun sits near the top of this range. Reads as accurate, which is what you want when the material is the point.
- Cool, 6000K and above. Overcast sky, clear blue sky at the far end. Reads as crisp and modern, or clinical if nothing warm balances it.
What colour temperature does to a viewer
Warm tones pull a space inward: smaller, closer, more comfortable. Cool tones push it outward: larger, more open, more formal. Neutral light gets out of the way so materials can be judged on their own.
You make this choice whether or not you make it deliberately. The default sun in your software already has an opinion.
Building a specific mood
- Serene morning. Slightly warm low sun, soft cool ambient, moderate intensity, generous shadow fill.
- Vibrant afternoon. Brighter, marginally warm sun, clear-sky ambient, crisp shadows, high contrast.
- Dramatic evening. Very low warm sun, or a deep blue ambient for the blue hour, with interior artificial light carrying the warm accents.
The work is in the balance between direct and indirect sources and their two colour temperatures, not in any single slider.
Artificial and mixed lighting: when the sun is not the whole story
Daylight is the foundation. Artificial light is how a building looks occupied, and it is mandatory for any twilight or night frame.
The four sources worth knowing
- Point lights. Uniform emission from one location. A bare bulb, general fill.
- Spot lights. A focused cone. Artwork, a facade detail, a deliberate pool of light on a floor.
- Area lights. Emission from a surface: ceiling panels, a light box, or a window standing in for the daylight arriving through it. Large surface, soft shadow.
- IES profiles. Photometric files describing how a real manufactured luminaire distributes light. If you want a scalloped wall wash that matches the specified fixture rather than a generic cone, this is how.
Layer, do not flood
Three layers, added in order. Ambient: enough general light that nothing goes pure black. Task: light where something happens, the counter, the desk, the stair. Accent: wall washers and spots on the things worth looking at.
Built in that order, you get depth. Adding lights until the room is bright gives you a shopping centre.
Balancing inside and outside
Twilight exteriors live or die on this. Interior light spilling through glazing has to match the scheme it came from, and facade lighting has to support the interior glow rather than compete with it. When the two disagree, the building reads as two images stacked on each other.
The architect's challenge: doing all of this by hand
None of the above is controversial. The problem is what it costs to execute.
The time sink
A realistic daylight setup means sun position, sky condition, cloud cover, haze, exposure, white balance and GI bounce settings, and every one interacts with the others. Each adjustment needs a render to evaluate honestly. Tweak, render, look, tweak again. Hours per iteration, days for a hero image.
The first SecondRender customers came from exactly this: hours per render, days or weeks on materials, lights and shadows.
Everything is coupled
Move the sun 10 degrees and shadow length changes, which changes how much light bounces into the interior, which changes the apparent colour temperature of the whole room. There is no isolated variable in a lighting setup. That coupling is the actual skill, and it takes years.
The pitfalls that keep recurring
- Flat lighting. No dominant direction, ambient too strong. Fix the hierarchy before touching contrast.
- Over-lit scenes. Too many sources, blown highlights, no detail left in the whites. Remove lights instead of adding fill.
- Wrong shadow quality. Hard shadows under cloud, soft shadows in direct sun. The shadow contradicts the sky.
- Shadows that disagree. Several sources casting in conflicting directions with no dominant sun.
- Dead reflections. Glass and polished stone rendering matte, usually with no real environment to reflect.
- Wrong white balance. A scene meant to feel warm arriving cold, or the reverse.
Every one is a physics contradiction. That is the pattern, and it is why more post-production does not fix them.
What AI changes about natural light archviz techniques
Here is the structural point, and it is the reason this article exists.
A traditional render engine reconstructs light from zero. It knows nothing about how a courtyard looks at 6pm in November. It knows how to trace rays, and you supply every fact about the scene. That reconstruction is honest work, and at the top of the field it produces images nothing else produces. It also explains the plateau: architects describe their own output as "acceptable, but not convincing enough" after years of practice, which is not a skill deficit.
A model trained on photographs starts from the other end. It has already seen real buildings under real skies, so the relationship between a low sun, a long shadow, a warm cast and a hazy background is not something it computes. It is something it learned. The plateau is structural, not personal: you are hand-assembling what the model already knows.
For a practicing architect that is the difference between a lighting study you schedule and one you just do. Sketch or SketchUp screenshot in, photorealistic render out, in about 30 seconds. Three times of day become 3 renders instead of 3 evenings, so lighting exploration moves back into the phase where the design is still open.
The workflow, concretely
You are not hunting for values. You are describing conditions.
- Start from what you already have. A hand sketch, a CAD screenshot, a SketchUp or Rhino view. No model preparation, no asset library, no render farm.
- Describe the light. Time of day, sky condition, mood. The model handles the coupling between sun angle, colour temperature and shadow behaviour that you would otherwise balance by hand.
- Lock the look once you find it. A saved style carries a visual identity into further renders. It transfers the look, never the geometry, so one daylight treatment can run across a set of images.
- Keep the source authoritative. Feeding a generated image back in as the source is how quality drifts across iterations. A pipeline that always renders from your original source avoids that failure mode.
- Iterate for real. Compare 5 lighting scenarios, then show the client 3 instead of the one you could afford to make.
Where AI natural light still falls short
This part is not optional, and the skepticism in the archviz community deserves a straight answer.
Consistency and predictability. Generative models trade some determinism for their speed. The same input does not guarantee the same output. While you are exploring lighting, that variation is useful. In final delivery it is a liability, and managing it is what styles and a source-authoritative pipeline exist to do.
Cross-perspective transfer. Render an object with exactly the lighting and detail you want, then get that same object, detail for detail, from a second camera position. That is still a hard problem across every AI tool on the market. If your deliverable is 12 perfectly consistent angles of one design, the craft pipeline is still the reliable road.
Art direction to the pixel. A visualization artist placing every source and grading every material for a flagship image is doing direction, not generation. These tools do not do that, and I am not going to claim otherwise. High-end archviz is art, and this technology does not produce it.
The first two are properties of the whole category of AI image models, not defects in one product. The difference between tools is whether the engineering is built around them or whether they are pretended away. My position is the boring one: claim engineering, not magic.
And the point of the technology is not to take work from anyone at the top of the market. It is that the architect whose alternative was no image at all now has one.
Beyond light: materials, camera and the final polish
Three things decide whether the lighting work survives into the final frame.
Materials
Perfect light on wrong materials still fails. Reflectivity, roughness, translucency and bump detail decide what the light does on arrival. Frosted glass has to scatter, polished stone has to return a sharp environment, concrete has to stay matte at every angle.
Focal length and composition
- Wide, roughly 18mm to 35mm. Expands space, exaggerates perspective, good for showing how light fills a large volume.
- Standard, around 50mm. Closest to human vision. The honest choice for an interior.
- Telephoto, 85mm and up. Compresses depth, isolates a detail, lets raking light on one facade element carry the image.
Composition then decides where the eye lands. Leading lines and framing should point at where the light is doing its best work.
Post-production, used lightly
Exposure and contrast for punch, gentle grading for mood, a restrained vignette, bloom on genuinely bright sources, depth of field where a real camera would have it.
Post-production polishes what is there. It cannot repair light that never behaved. That order is the whole argument of this article in one sentence, and it continues in what separates acceptable renders from photorealistic ones.
The short version
Believable natural light is not a set of values. It is a set of agreements: shadows agree with the sun, fill agrees with the sky, reflections agree with the environment, artificial light agrees with the hour.
Traditional rendering asks you to construct every one of those agreements yourself, which is why it takes years to do well and hours to do at all. A photography-trained model inherits them, which is why a lighting study can now happen while the design is still open.
Neither approach makes the other pointless. One of them just means an architect without a visualization team is no longer choosing between a bad image and no image.
If you want to see whether that holds on your own projects, book a free 30-minute demo. I will render one live from scratch and answer every question, including the skeptical ones.