Sketch to Render: Photorealistic Images from Any Drawing in 30 Seconds
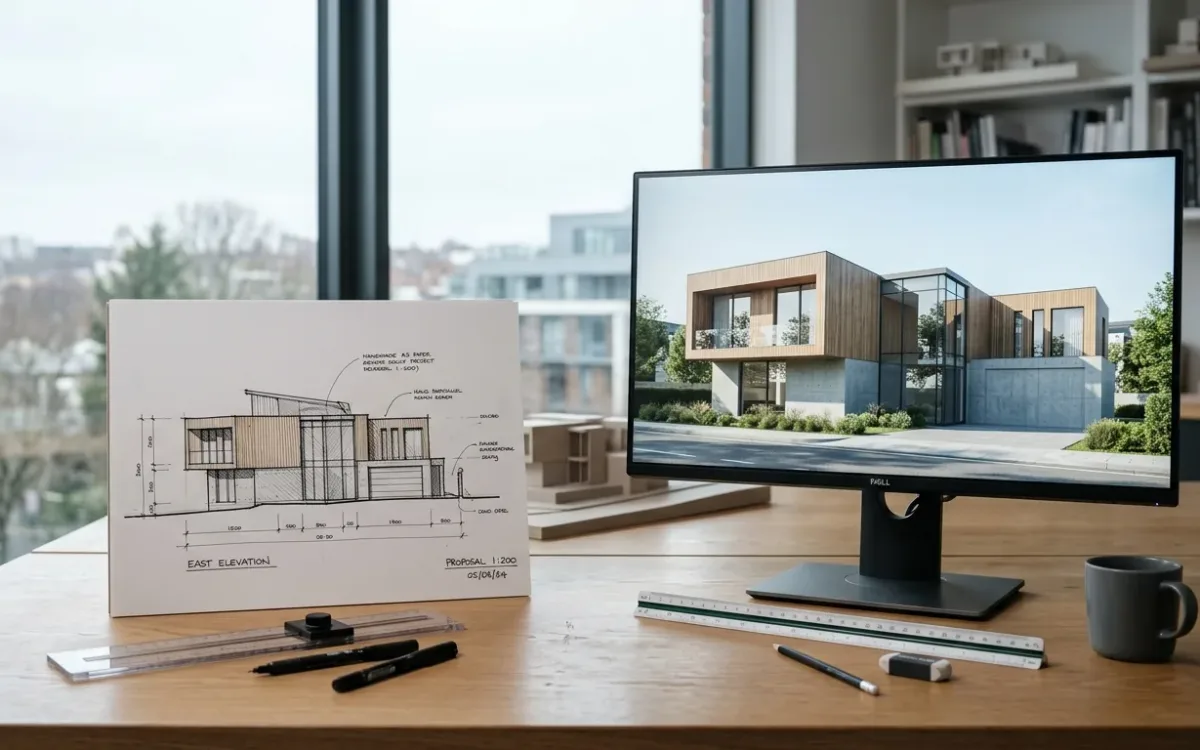
Sketch to render means what it says. A drawing goes in. A photorealistic image of the same design comes out. About 30 seconds, no render farm, no overnight wait. The drawing can be a napkin sketch, a Procreate line drawing, a scanned pencil perspective or a SketchUp screenshot, because the realism comes from the model, not from your linework.
That last part moves rendering to a different place in your process, and this is the part worth slowing down for. A render used to be the final step: finish the model, dress the scene, light it, then produce an image that sells a decision already made. A sketch sits at the opposite end, where nothing is committed and every decision is still cheap. Rendering straight from it means you can see, and show, what a design intends before you have spent a single modeling hour on it.
Design-intent visualization: rendering what a design means while it is still a sketch, so the reaction arrives while changing course is still cheap.
This does not replace your final imagery. It adds the image you never had, the one at the beginning. The most valuable moment to see a design realistically is the moment it can still change.
What counts as a sketch
More than you expect. All of these are valid input:
- Hand drawings. Photograph or scan them. Pencil, pen, marker, whatever you think in. Perspective drawings work best, loose is fine. The model reads intent, not line quality.
- Digital drawings. Anything out of Procreate, Photoshop, or the drawing app you already use.
- CAD and 3D screenshots. A viewport grab from SketchUp, Rhino or Revit is excellent input. No materials, no lighting rig, no export ritual.
- Flat or old renders. An existing image that looks dated can go in as the base for a more realistic pass.
The common thread is zero preparation. Traditional engines demand a finished, textured, lit model because they reconstruct reality computationally, from zero. A model trained on photography already knows what brick, glass, morning light and beech trees look like. Your drawing only has to supply the design.
How sketch to render works, step by step
1. Upload the drawing. Drag the image in. Optionally add a short prompt for what the drawing cannot say: "red brick facade, autumn afternoon, residential street".
2. Set the scenario. Architectural style, time of day, weather, season, environment, vegetation. Pick from presets or set the values yourself. It takes seconds, and letting the AI decide is a legitimate first pass.
3. Render, react, repeat. The image arrives in about 30 seconds. Here the workflow stops resembling anything you have used before. An iteration is nearly free, so you generate variations instead of defending one attempt. Warmer materials. Winter. Street level. Dusk. 10 directions before lunch is a normal morning, not a stunt.
4. Lock what works. When a direction lands, use Save as style. A style is a reusable visual identity that carries the look, never the geometry, across the rest of the project, so your images hold together. When an image is final, upscale it and export at 4K for boards and documents.
That is the whole loop. There is no step 5 where you learn a render engine.
What you control, and what you direct
Fair question from anyone with rendering experience: how much of the result is mine? The honest answer has two halves.
You control the design. The geometry and composition of your drawing are treated as the authority. Fidelity mode makes that explicit: the source stays authoritative, geometry and physical materials are preserved, and a style transfers rendering quality only. The AI's job is realism, not redesign. You also control the scenario: style, light, season, weather, surroundings.
You direct the details rather than dictate them. A generative model fills in the world around your design plausibly, not identically each time. During exploration that variability is genuinely useful, because it shows you options you did not think to ask for. For final delivery it is a limitation, and you should hear it from me rather than from a deadline.
Two limits, and they are properties of the whole category rather than quirks of one product. The same input does not guarantee the same output. And carrying an object, detail for detail, from one rendered perspective into a second perspective is still hard. Styles and fidelity mode narrow both of these considerably. They do not erase them. If your deliverable is 12 perfectly matched views of one design, that is craft-pipeline work today, and it is better to know that on day 1 than to discover it on deadline.
Where sketch to render earns its keep
- The client meeting, live. "What about warm wood?" answered with an image before the meeting ends, not in Friday's follow-up mail. Iterating inside the conversation is the single biggest change to how the meeting goes.
- Early client alignment. Clients cannot read plans. Nearly every architect has a story about the client who approved the drawings and was surprised by the building. A photorealistic view at sketch stage surfaces that misunderstanding while it still costs nothing. One caution, deliberately: a photoreal image can make a client believe the design is finished. Say what the image is for when you put it on the table.
- Competitions and pitches on real budgets. Board-ready presentation images without a visualization line item.
- Your own design process. Some of the value has no audience at all. Seeing your sketch photoreal an hour after drawing it is a design tool, not a deliverable. Sometimes the render kills the idea. That is the render working.
Who this is not for
If you are a visualization specialist producing hero images for a campaign, this is not your tool and I am not going to pretend otherwise. Placing every light and grading every material for a flagship image is direction, and direction is not generation. Sketch to render is for the architect with a deadline, a drawing, and no viz team. For that architect the alternative was never a studio image. It was no image.
What to do next
Take one sketch, the roughest one on your desk, and run it. One render, free. That answers the question this article cannot: whether it works on your projects, your drawings, your kind of building. If you would rather watch it driven by someone who knows the controls, book a free 30-minute demo. I will render one of your drawings live, from scratch, and answer every question, including the skeptical ones.
For the wider context around this workflow: the complete guide to architectural rendering covers the economics of every rendering path, and the archviz overview maps where AI genuinely fits in the visualization landscape, including what it still cannot do.
From source image to a design conversation
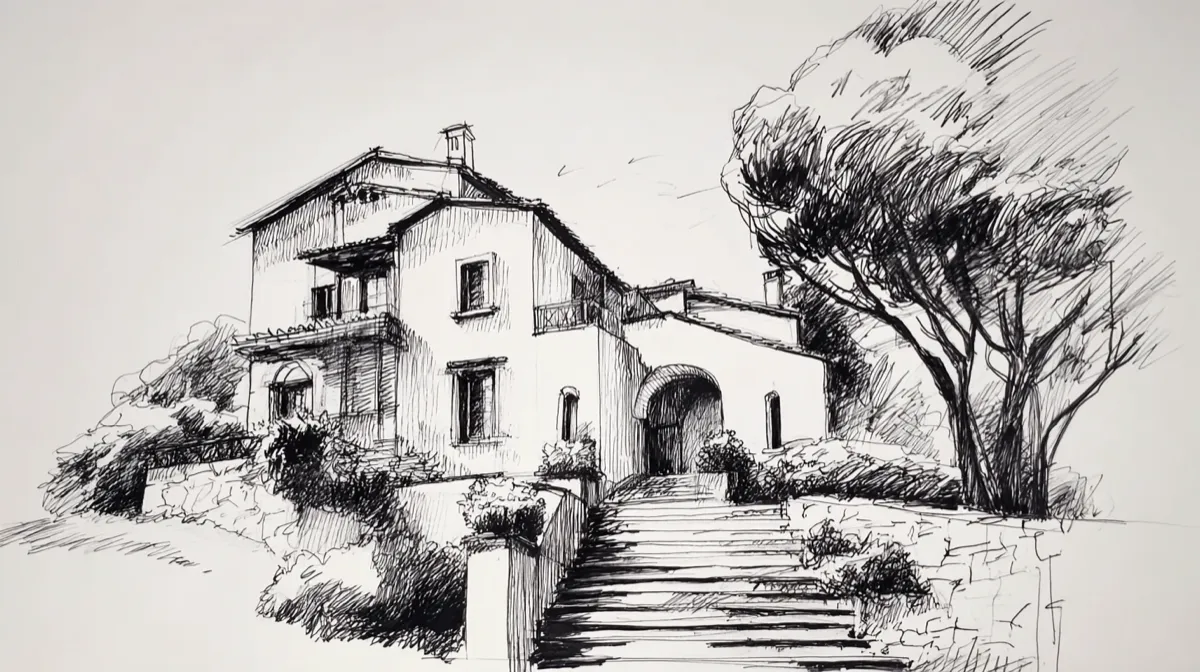
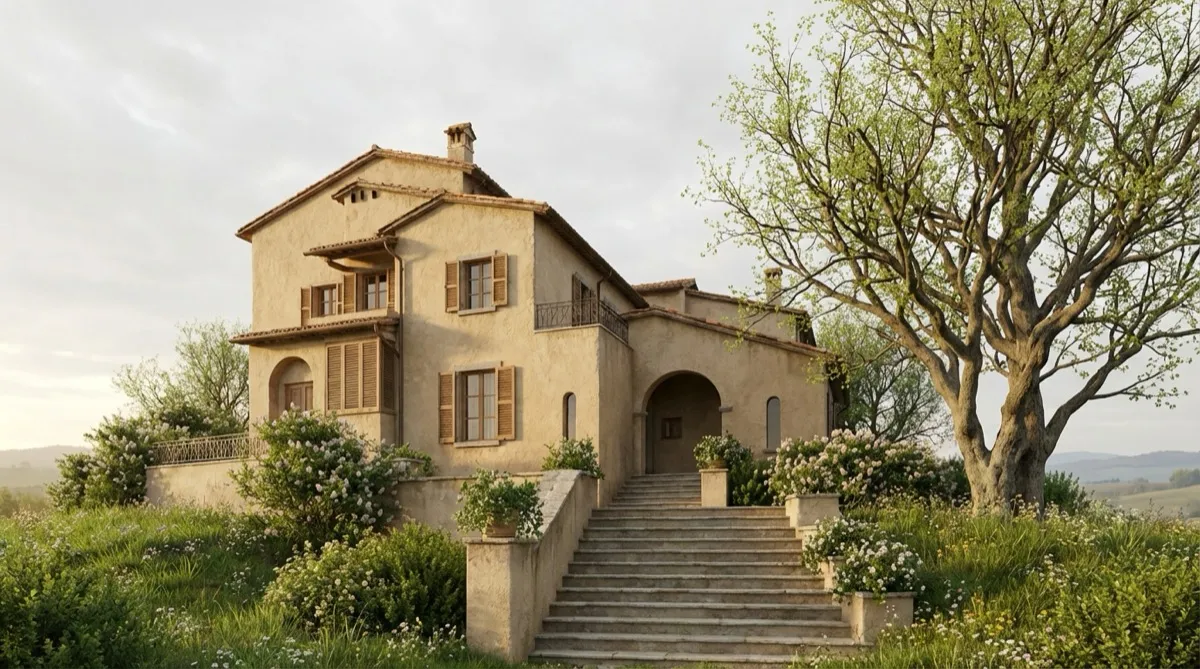
This sketch and visualization are an existing SecondRender public example. Compare the roof, entrance and openings before judging the atmosphere.
A practical workflow to try
- Photograph or scan your sketch square-on. Crop out the desk and keep openings and important edges legible.
- Upload that image to SecondRender. Decide what the visualization should help you discuss: material direction, light or atmosphere.
- Write a short brief. For example: warm plaster, soft daylight, restrained planting. This is a suggested starting brief, not the recorded prompt for the example above.
- Compare the result with your source. Check rooflines, openings, floor levels, railings and surroundings. Reject or revise an image that changes something the discussion depends on.
- Show the source beside the selected result. Tell the client which parts are established design decisions and which are still visual exploration.
These examples do not include a recorded prompt, model version, settings or elapsed time. They show a visual transformation, not a benchmark or a promise of exact geometry.